Spring Secondary Motion
- Home
- Tools
- Physics Tools
- AutoPhysics
- Spring Secondary Motion

A different variant of the Secondary Motion effect.
This instrument too improves animation generated by AutoPhysics by making it more smooth and accentuated, but uses a different approach to achieve its effect.
Depending on the original animation, the effect can be more or less pronounced that the one generated by the regular Secondary Motion.
The two features can also be used in conjunction.
Enabling Spring Secondary Motion
This effect can be enabled or disabled by enabling or disabling the Secondary motion parameter.
1. Go to the the Physics settings panel.
2. On the AutoPhysics tab, enable the Spring secondary motion parameter:
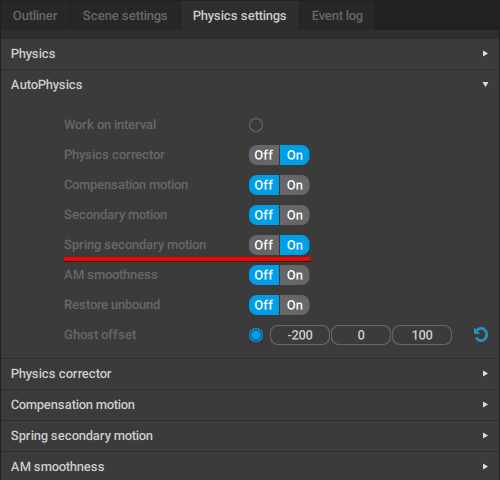
This will enable the Spring Secondary Motion feature, but with default settings, its effect won't differ from the original animation.
Next, you'll need to define parts of the character to apply it to.
3. Select the Point Controllers associated with the parts of the character you'd like to use Spring Secondary Motion on.
4. (optional) If you'd like to only apply Spring Secondary Motion to selected frames, select these frames on the Timeline.
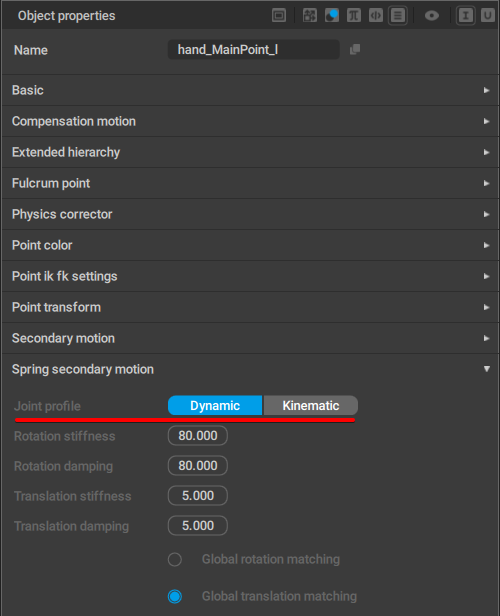
5. On the Object Properties panel, go to the Spring Secondary motion tab and set the Joint profile parameter to Dynamic option:
6. Enable Interval Edit Mode.
This way, the tool would be applied to every (selected) frame.
After this, the effect of Spring Secondary Motion should become visible the scene.
Keep in mind, however, that the effect would be applied exclusively to the selected Point Controllers on the selected frames. The rest of animation won't be affected by it.
Spring Secondary Motion Settings
A set of parameters for Spring Secondary Motion tool as a whole can be found on the Physics settings panel, under the Spring secondary motion tab:
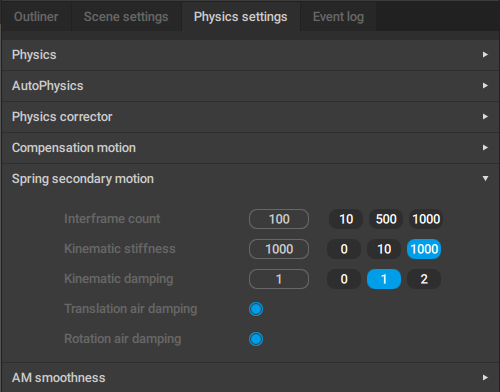
Currently, this tab only includes one parameter:
Interframe count
This parameter sets the number of subframes used for calculating Secondary Animation.
Increasing this value increases the stability of the effect.
Decreasing the value, on the other hand, decreases the impact on performance.
It is recommended to increase the value when Secondary Animation becomes distorted, and decrease it when the AutoPhysics simulation becomes too slow to work comfortably.
The default value is 100.
The next two settings are intended for controlling the pull-up effect, i.e. how the objects are moved to their original positions.
Kinematic stiffness
Sets the strength used to pull the physics assistant to the original animation.
Kinematic damping
Sets how fast the pull-up effect should fade.
Translation air damping
Enabling this option limits the global translation speed, as if wind resistance slows it down.
Disabling this option limits the local speed in relation to the parent object instead.
Rotation air damping
Same, but for the rotation speed.
Settings for Point Controllers
You can also manually adjust how Spring Secondary Motion should work with any individual Point Controller. This can be done using parameters found on the Object properties panel, under the Spring Secondary Motion tab (this tab is specific to Point Controllers):
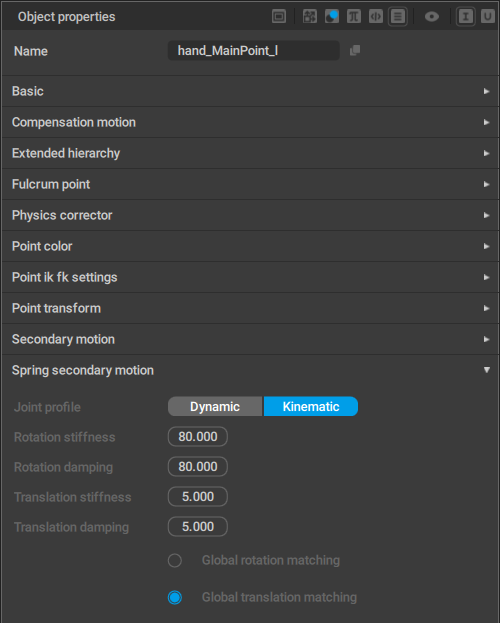
Joint profile
This switch defines the method used to change the objects' positions:
- Dynamic means that the objects are moved by applying physical force to them. Objects accelerate in proportion to their masses and the force applied.
- In the Kinematic mode the objects follow their local movements in the original animation.
- If Kinematic is used for the entirety of the Timeline, the objects' movements would coincide with their movements in the original.
- If a Kinematic interval follows a Dynamic interval, the tool would try to pull up the objects to their original positions on the respective frames.
- This motion does not involve forces, masses etc.
Rotation stiffness
Controls the amplitude and the frequency of the oscillations that make up rotation part of the spring secondary motion.
Rotation damping
Defines how fast rotation should fade.
Increasing this value accelerates the fading.
If the value is equal to the Rotation stiffness, oscillations fade out evenly; if it is lower, the objects oscillate more; if it is higher, oscillations stop quickly.
Translation stiffness
Controls the amplitude and frequency of the oscillations that make up secondary motion effect.
Increasing this value decreases the amplitude and increases frequency.
Translation damping
Controls how fast the oscillation should fade.
Works on the same principle as Rotation damping described above.
Global rotation matching
If this is enabled, rotation is performed in Global space.
Otherwise, it uses Local space instead.
Global translation matching
Same as above, but for translation.
Pull up Settings
The final two settings are intended for controlling the pull-up effect, i.e. how the objects are moved to their original positions on intervals with the Kinematic setting enabled.
Pull up stiffness
Sets the strength used to pull the physics assistant to the original animation.
Pull up damping
Sets how fast the pull-up effect should fade.
Aside from these parameters, Secondary Motion is affected by the Gravity setting. The same set of settings with different Gravity values would produce different results.
Examples
The effects these parameters have on the animation can be better understood by seeing them in action:
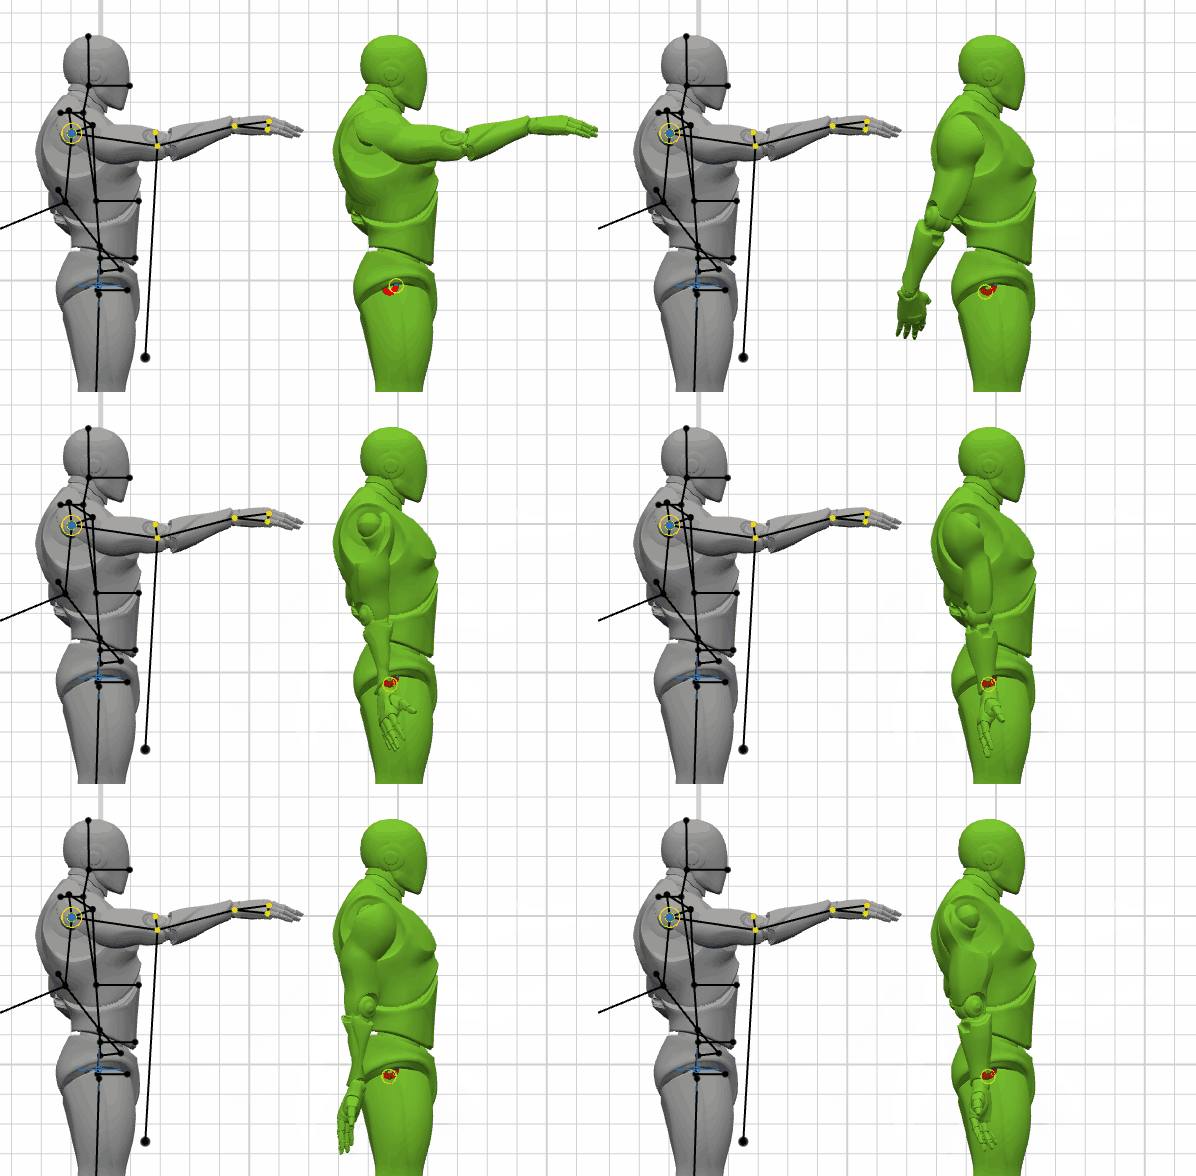
1. Here, Translation damping is set to 1, while every other parameter is 0. Gravity causes the arm to fall down and wave.

2. If we increase the Rotation damping value to 10, the arm's osicllation quickly fades away.
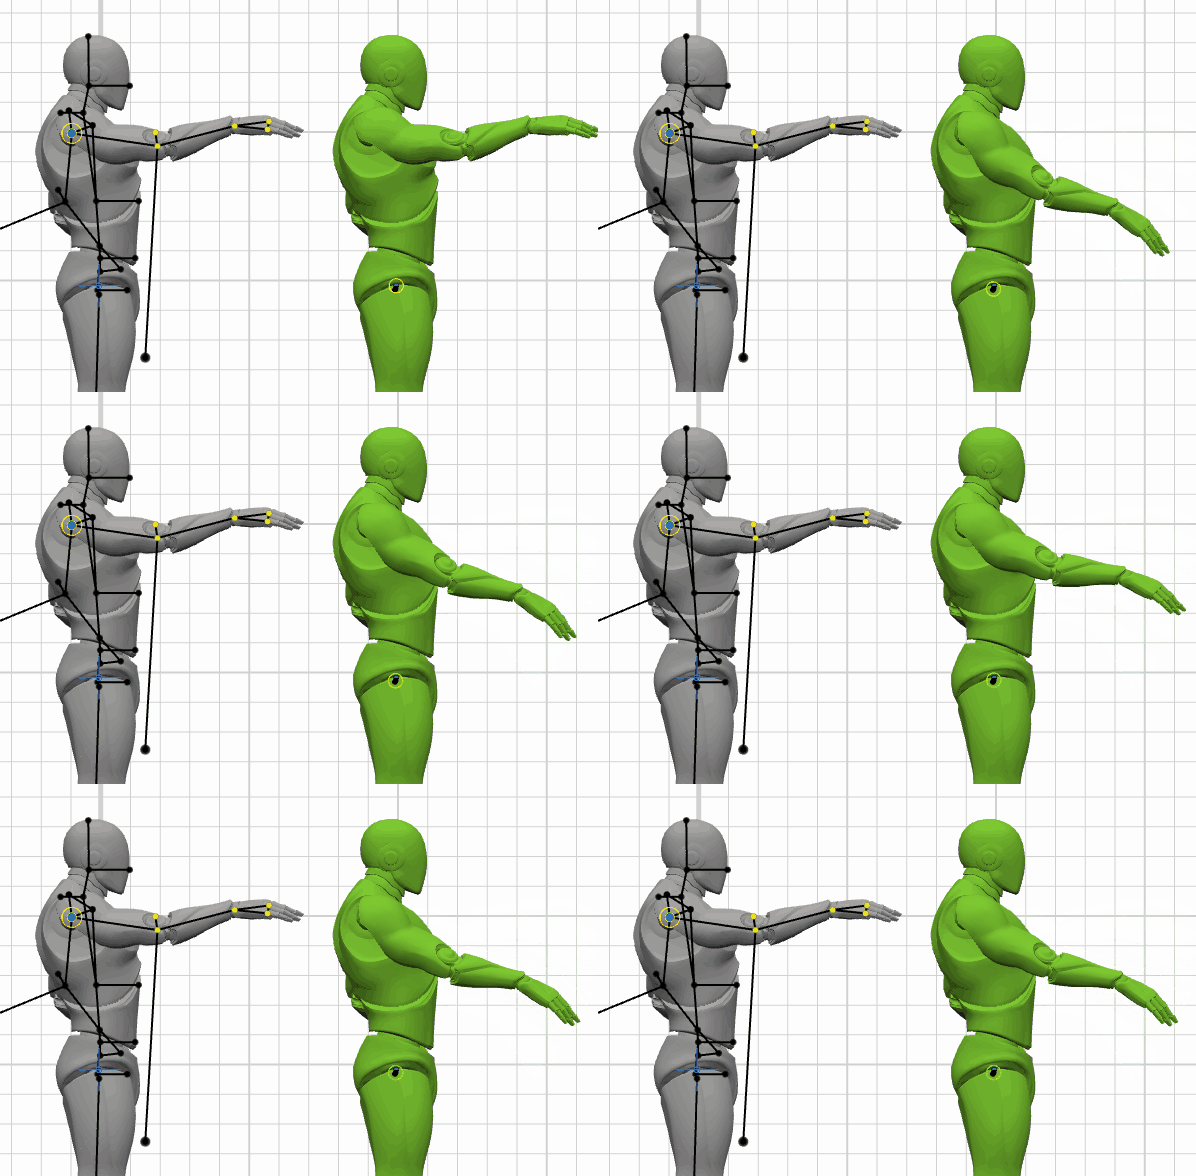
3. Increased Rotation stiffness (to 50) causes the arm to keep closer to its original position, although oscillation still happens.

4. Setting Translation damping to 10 instead of 1 causes the whole motion to become slower and less pronounced, as if the environment has become more dense.
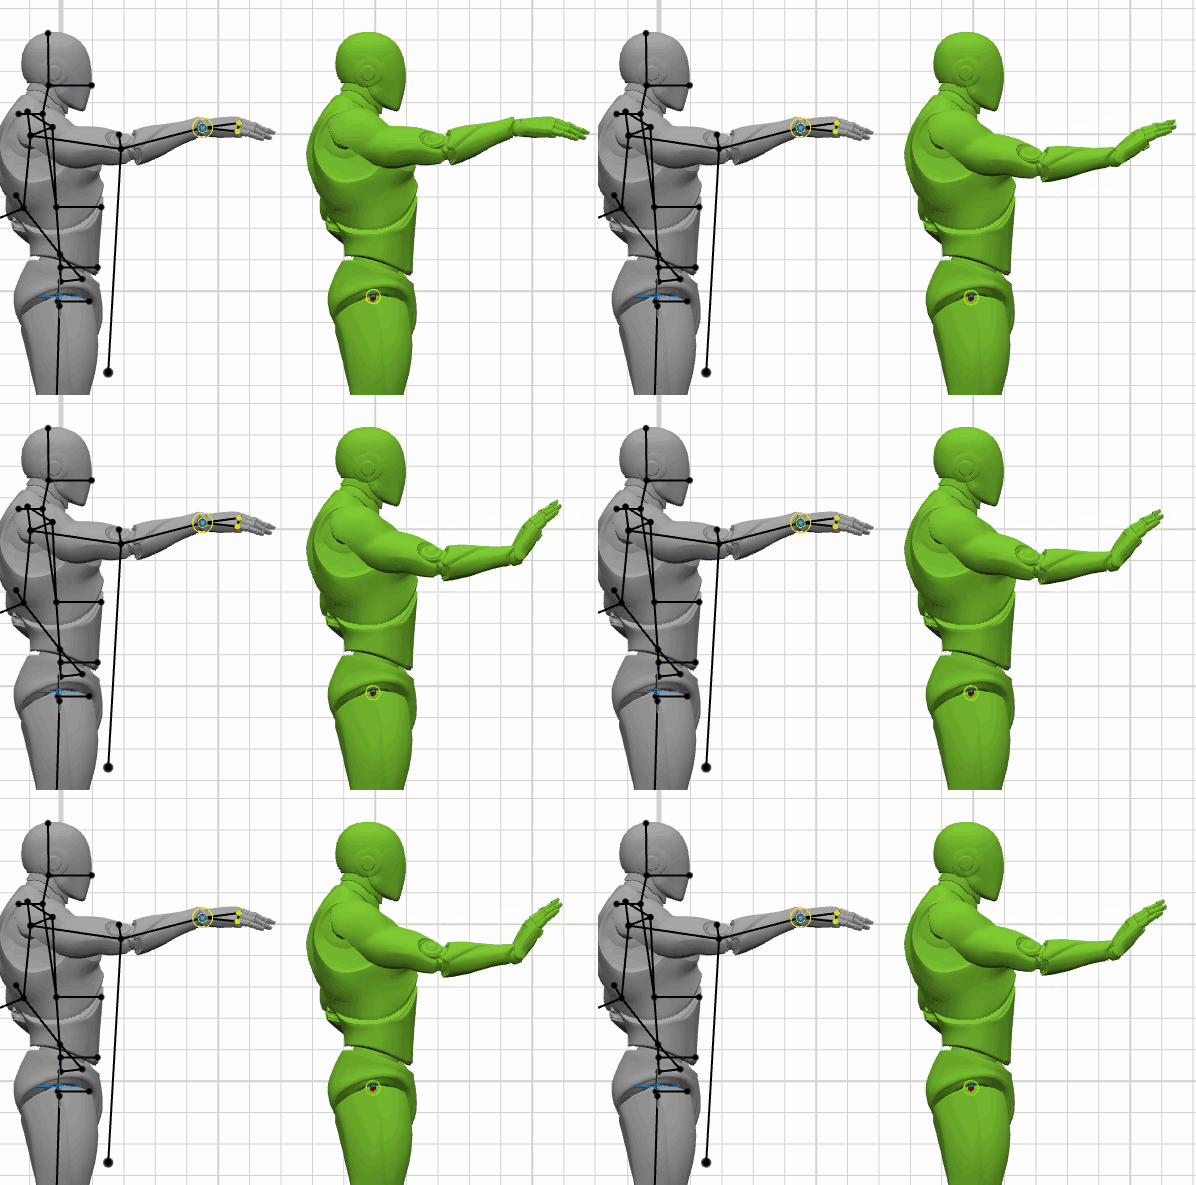
5. Finally here the parameters for the arm are the same as in the previous example, but the hand has increased Translation stiffness (15).
Because of this, the hand 'tries' to keep its original position and sort of drags the entire arm after it.