Quick Rigging Tool
Creating character rigs can be a long and complicated process. However, if you are rigging a humanoid character, there is an option to do it in a much more convenient way.
Enabling Quick Rigging Tool
To enable this tool:
1. Click the Rig mode button on the Toolbar:

2. The Rigging tools panel will appear at the left side of the window:
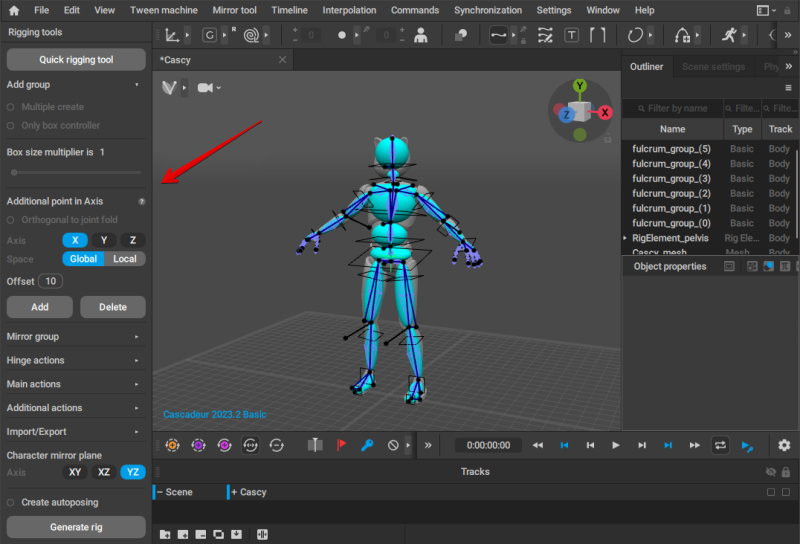
3. In this window, click the Quick Rigging Tool button:
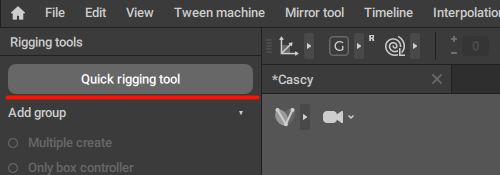
After this, the Quick Rigging Tool window should appear.
Interface
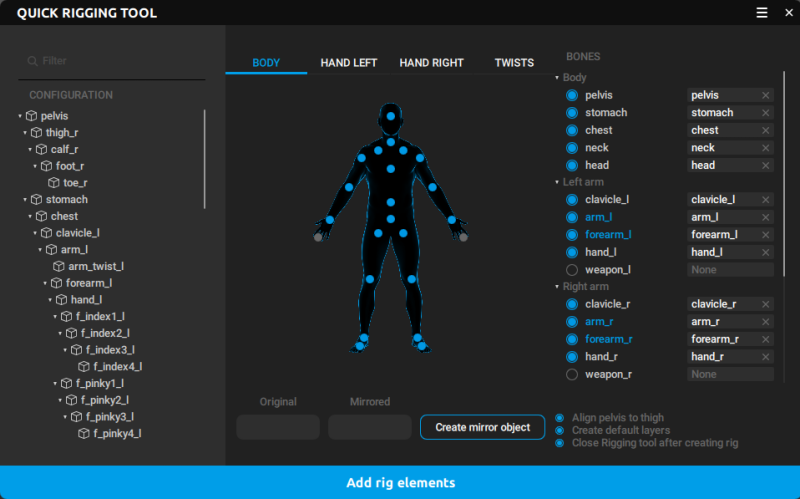
Quick Rigging Tool includes several parts:
Configuration
On the left side of the window, you have the hierarchical list of joints in the model you’ve imported.
The middle section of the window shows a graphical representation of the selected body part.
The points in this image represent the positions of the rig elements. The color of a point shows its state:
- a grey point is empty
- a blue point has a joint connected to the corresponding part of the rig
These points can be used for creating prototype elements.
This section is separated into several tabs, each with a different set of points:
- Body
- Hand Left
- Hand Right
- Twists (contains points for Twist Joints)
Bones
The right side lists the elements of the standard Cascadeur rig.
For convenience, they are separated into several panels such as Body, Left arm, Right arm etc. What panels are available depends on the tab selected in the middle section of the window.
Create mirror objects
Clicking this button will generate prototypes for symmetrical joints.
To use this feature:
1. Drag a joint to an appropriate point
2. In the Original field, enter the part of the name of this joint that designates it as either left or right (for example, if the joint is named "arm_l", the part you need to enter would be “_l”)
3. In the Mirrored field, enter the differential part for the joint on the opposite side (“_r” in our example)
4. After this, click Create mirror objects. The tool will automatically create prototypes for both the original and the mirrored joint.
See Mirroring page to learn more about naming symmetrical joints.
Additional parameters
These settings are found at the bottom right corner of the window.
They control various nuances of how the rig is generated.
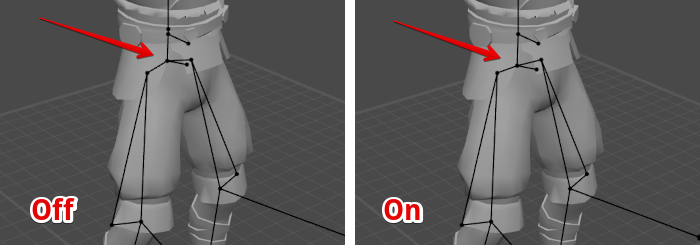
Align pelvis to thigh
If this option is enabled, the point associated with the pelvis joint is moved is projected to the line that connects the thigh points:
Create default layers
If this is enabled, the newly created rig elements are placed on different Animation Tracks, similar to what is seen in Cascadeur sample scenes.
Enabled by default.
Close Quick Rigging Tool after creating rig elements
If this is enabled, the Quick Rigging Tool would close automatically after you generate the rig elements.
Add rig elements
Clicking this button generates sets of prototypes for the joints you’ve added to the Bones list.
Using Quick Rigging Tool
Quick Rigging Tool gives you an option to quickly create prototype elements using the standard Cascadeur rig as a base.
To create a set of prototypes for a joint, simply drag this joint from the Configuration to the point it should correspond to:
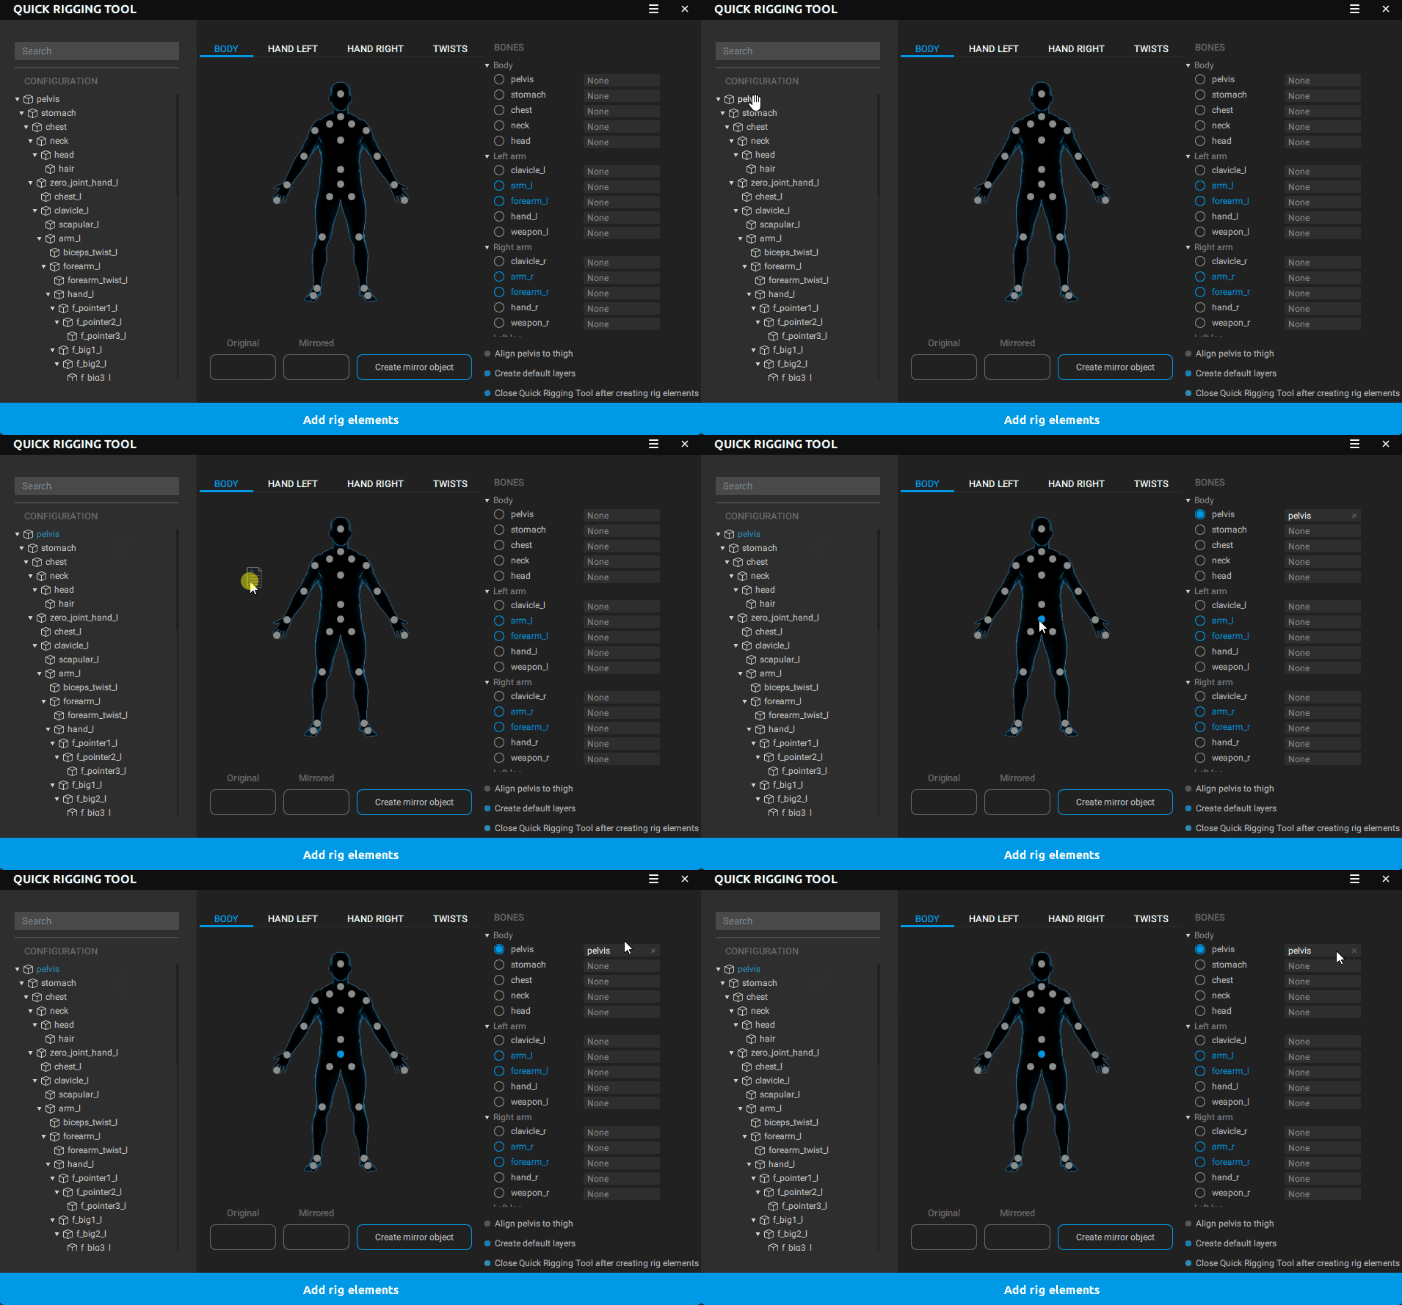
Alternatively, you can drag the bone to the corresponding item in the Bones list.
Repeat this process for every joint you want to rig.
To remove a joint from the Bones list, click X next to its name:

You can also use the Create mirror objects feature to simplify the rigging process.
You don’t have to rig every joint in the skeleton. However, certain joints are required to be rigged if you want your rig to work correctly. These joints are colored blue in the Bones list:
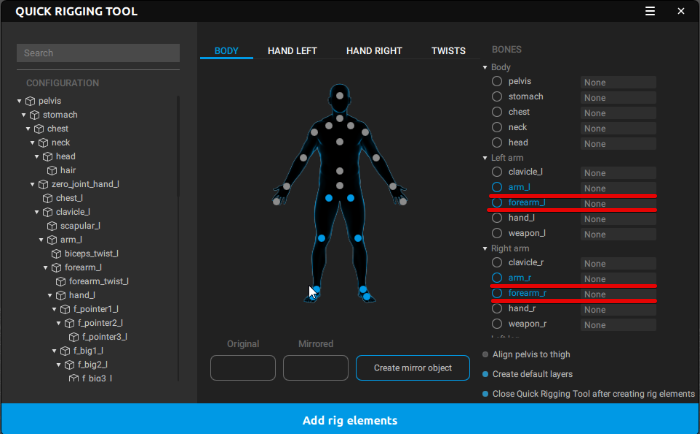
After you've finished adding joints to the Bones list, click Add rig elements to generates sets of prototypes for these joints.
Once the prototype rig is generated, close Quick Rigging Tool and go to the Rigging Tool window:
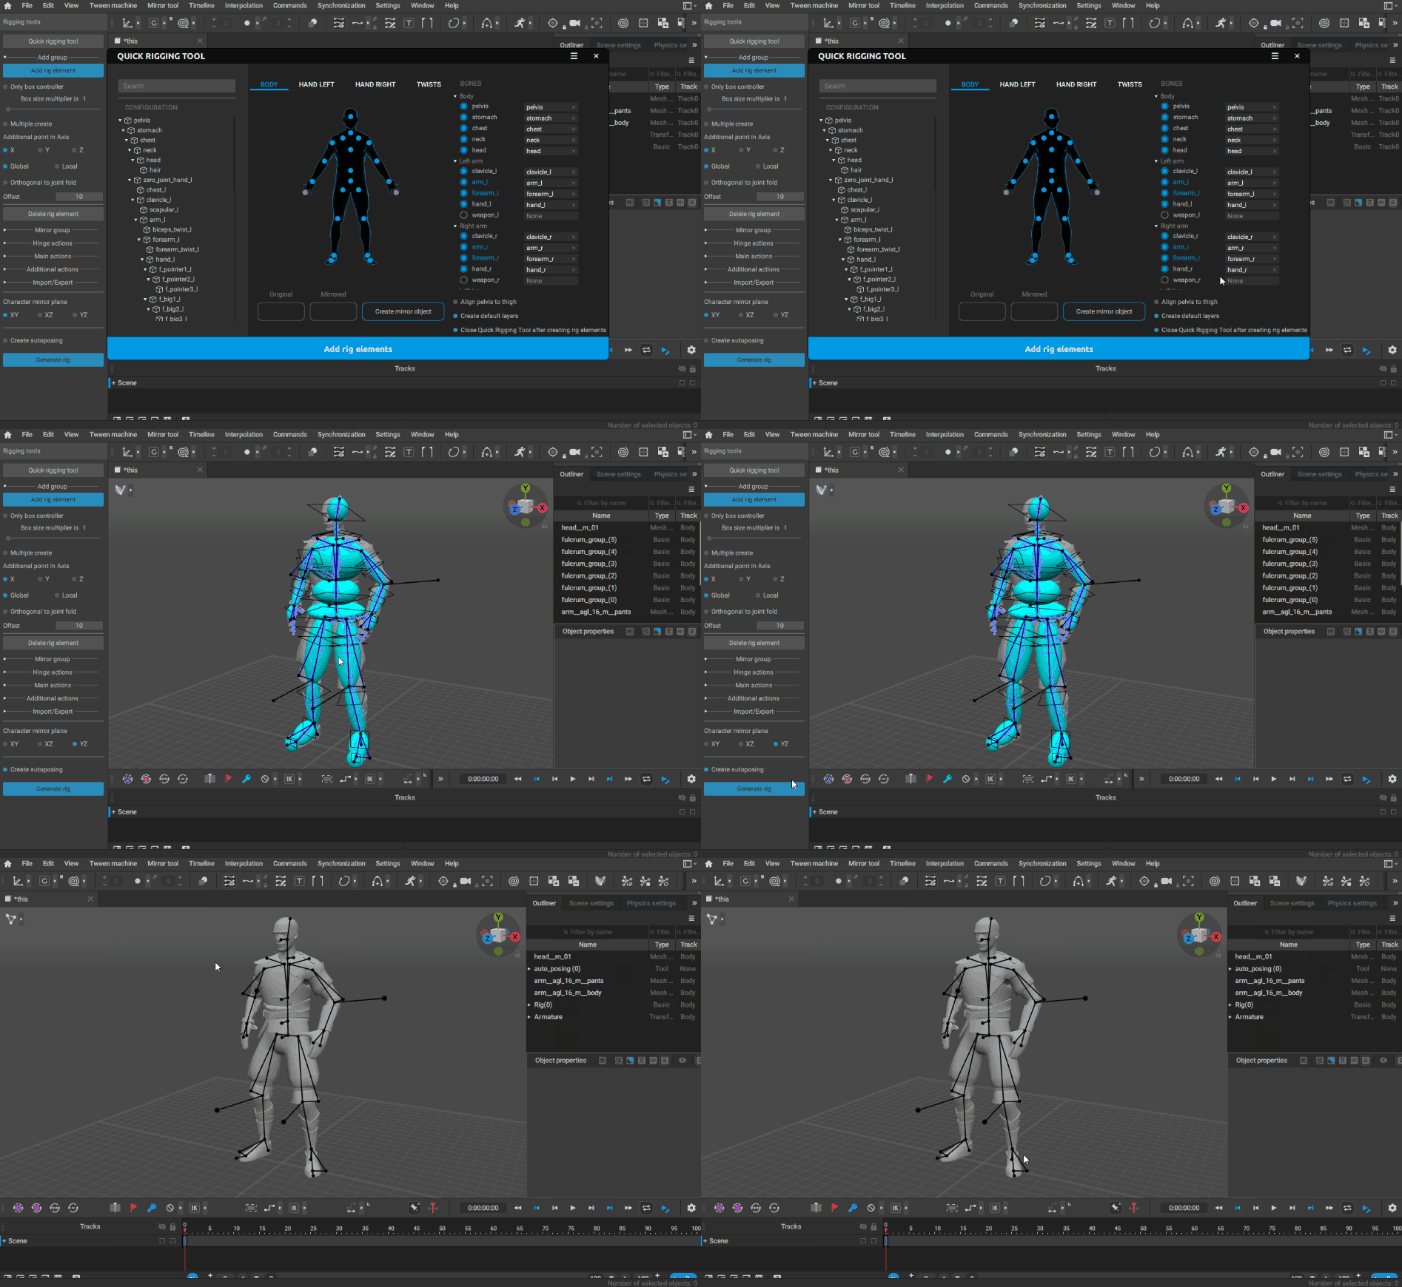
You can use the Rigging Tool to further adjust the generated rig, if this is necessary.
Once you’re done, simply click Generate rig to finalize your character.
Import and Export

After you finish creating prototype objects, you can save this setup to use it with another character. To do this:
1. Click the button near the cross sign.
The following menu will appear:

2. From this menu, select Export.
3. Set the name for the file.
To apply a previously saved setup to a new character:
1. Open the same menu as described above.
2. Select Import from it.
3. Select the file containing the prototype data.
After this, you should get a set of joints connected to the corresponding rig sockets. You can either convert them into prototype objects right away (using the Create prototypes rig button), or make some further adjustments, if necessary.
Prototype rigs are saved using a dedicated file format. They cannot be read by any other software.